
If several devices are to be added at once, this can be done via the CSV import.
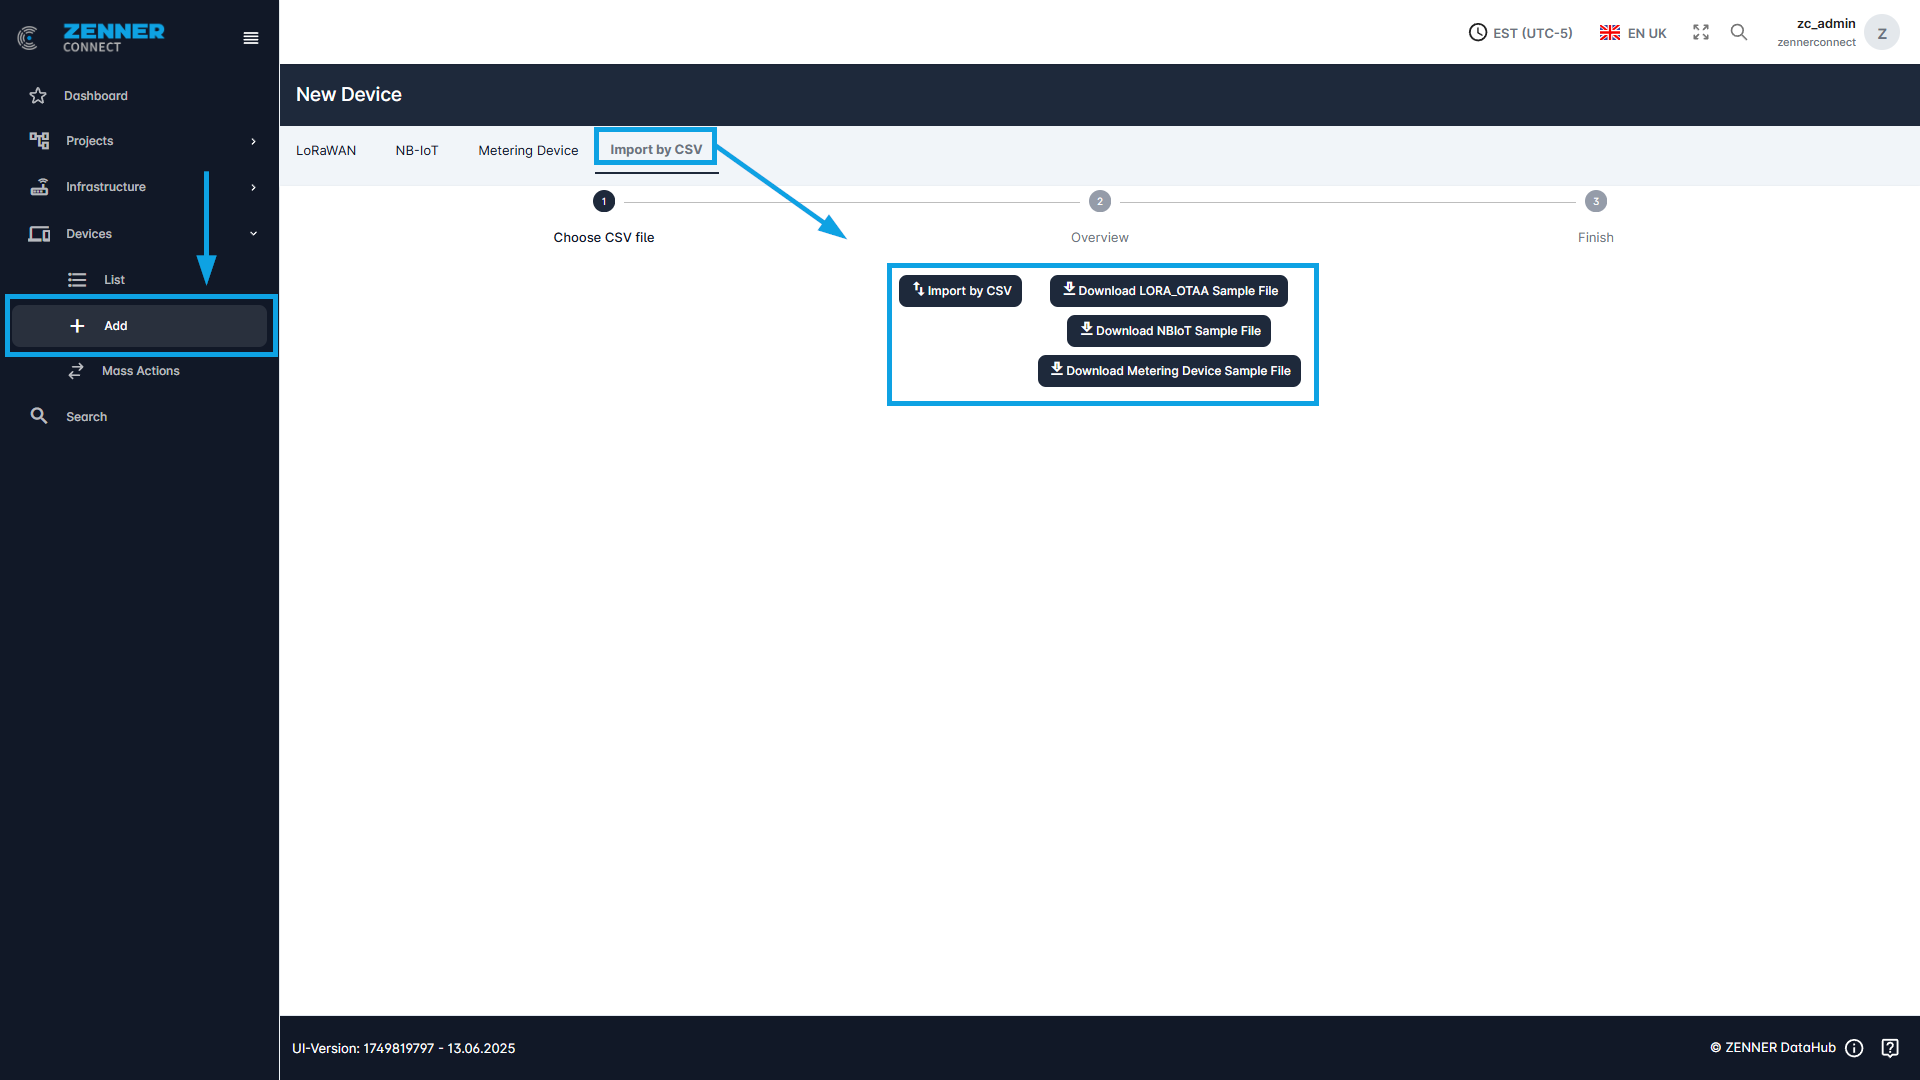
The sample file is downloaded for this purpose. The information on the respective sensors is entered in the fields provided for this purpose. The new file is then uploaded using the “Import by CSV” button.
The sample file of the type of device to be imported must be selected here. It is not possible to import different device types with a single device sample file. The corresponding sample file must be selected for each device type.
Important: The correctness of the data entered is not checked during import. If there is an error in DevEUI, JoinEUI or Appkey, the device is created anyway. However, it will not be able to connect if the data has been entered incorrectly!
In the following an excerpt from a sample CSV file for LoRaWAN devices:

Field | Meaning |
devEUI | The devEUI (Device Extended Unique Identifier) of the device |
type | The device type must be always LORA_OTAA → can remain as in sample file |
joinEUI | The joinEUI of the device |
appKey | The appKey (Application Key) of the device |
devAddr | The devAddr (Device Address) of the device, automatically regenerated during each join process when activated via OTAA → can remain as in sample file |
nwkSKey | The nwkSkey (Network Session Key) of the device, automatically regenerated during each join process when activated via OTAA → can remain as in sample file |
appSKey | The appSKey (Application Session Key) of the device, automatically regenerated during each join process when activated via OTAA → can remain as in sample file |
rxDelay | RxDelay must be always 4 → can remain as in sample file |
classC | True for class C devices, otherwise false |
activated | True or false (only if it is activated it can join) |
parser | The parser is selected here, for ZENNER & PDC/NDC Devices it must be Minol/ZENNER |
status | Installation Status of the device → Mounted or dismounted |
| locationId (Project ID) | Project ID of the existing project to which the device is to be assigned, if needed |
street | The current street of the device location |
houseNo | House number of the device location |
postalCode | Postal code of the device location |
city | City of the device location |
geoType | Always enter “Point” unless no longitude and latitude are entered |
latitude | Latitude of the device location |
longitude | Longitude of the device location |
differentAddress | A different address can be entered here |
tenant | The tenant in which the device is created |
country | The country of the device location |
buildingNumber | The building number of the device location |
unit | The unit number of the device location |
alternative_address | An alternative address can be entered here |
| installationDate | Here you can select when the device was installed |
removalDate | Here you can select when the device was removed (if possible) |
installationPosition | Current installation Position of the device → e.g. room or floor |
medium | The medium captured by the device → water, electricity, gas |
manufacturer | The manufacturer of the device |
meterType | The meter type of the device |
pulseFactor | Pulse Factor = quantity of a pulse (see technical documents for the respective meter/device) Only important for sensors that send their data with pulse output, like ZENNER PDC/NDC Devices Must be entered, otherwise the calculation of the actual readings (measured values) and consumption will be wrong |
meterSize | The size of the meter |
initialMeterRead | Initial Meter Read of the device → Must be entered, otherwise it will assume 0. If nothing is entered, the value may be incorrect |
tags | To which tags the devices should be assigned |